Are you itching to write a blog online ? Do you like to write about Gadgets? Do you have a passion to write a story or experience that you want to share ? Do you want to generate income for yourself or your family ?
Then you could be starting a Gadget Blog - just like this !
Opening a weblog can be your exciting and easy solution to getting started.
Blogs are no longer just for the “professional writers” and any joe blogs can do it with a little bit of hard work and dedication.
Successful blogs are today made by the thinker, the gadget lover, the fashion guru, the programmer, the mom, the craftsman, the cook, the chef, the tutor and so on. Its much easier than you think to build one today.
In 2010, I chose to start a blog on gadgets and technology and build my personal platform on the internet. It’s now become an almost full-time career and it has permitted me to make a decent side income to indulge in my passion that is gadgets and technology.
Sadly, I see many people not chase their dream without any success because they don’t know where they should begin or even the basic “setup process” of a website is too complex for them. But really, it’s not that hard and I am going to show you how.
Below I have laid out a simple step-by-step procedure to obtaining a domain, establishing your web hosting, and also installing your first WordPress website in just ten minutes or less. I will also show you how to use the theme I use on this website called the “Rehub theme” with examples like –> ( above i used the short code box with the option “box with title” shortcode to show the fancy title)
[Rehub theme : Shortcode box]
[I will throughout this article also show you examples of short-codes I Use with the Rehub theme to make it look a little bit more fancier like this [ Rehub theme – Shortcode Eg.]]
[Rehub theme : Using Divider Dotted and Double Shortcode example ]
You have numerous different ways to set up an online blog, but you will be hugely benefitted by going for “self-hosted WordPress weblog” that contains all necessary html regulations and can be optimised and changes as per your liking as you learn more about it.
The initial or first step for setting up a blog is purchasing a domain name and setting up your web hosting. If you do not know the difference between created and hosted and self-hosted WordPress, go through this useful info graphic that clarifies it well.
I would advise you not to use wordpress.com (which is a free option) as it does not allow you to scale your blog and has many restrictions due to being a free service.
[Rehub theme : Using highlight Shortcodes example ]
Essentials To Get Your blog Up and Running :
- 1. Need to Have a Credit Card for payment
- 2. A Domain Name Idea
- 3. Setup Your Hosting
- 4. WordPress Software (free with hosting)
- 5. A WordPress Theme To Install ( Free themes available)
[Rehub theme – Above I have used list shortcode with type: check and used pretty hover]
Step #1: Purchasing A WWW Domain name/url for Your blog
The web domain of my blog site is GadgetAustralia.com. Here online surfers and people searching for gadgets and technology discover me on the web. Selecting a great domain name is not always easy with millions of good domain names already taken. Your own domain name may either be your name or a branded domain name such as GadgetAustralia.com.
Luckily, the web hosting company I am going to recommend in step #2 provides you a free domain name when you register.
Step #2 Preparing Your Website Hosting Account.
This is where your blog will certainly “live.” – On the internet. This really is a server in the cloud (i.e., an isolated PC or network space, where you can rent space to install the WordPress software program and also handle your blog or blogs. It’s far easier than it actually sounds.
There are a hundred of web hosting services available, however, based on my previous experiences and research done on hosting providers , I do recommend bluehost.
I really do believe it will be the best option for most people for the following reasons:
1. Bluehost is a very large and popular hosting company (corporate responsibility)
2. They offer outstanding and prompt customer service (situated in the US).
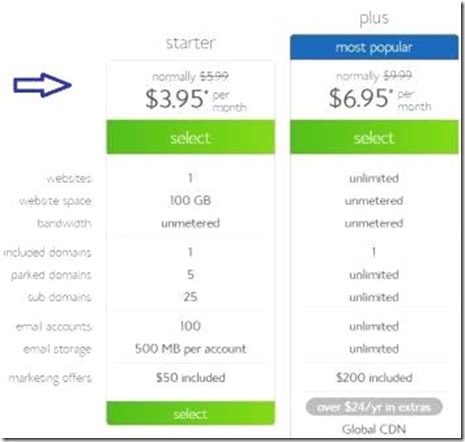
3. Their offers are highly reasonably priced and competitive. When you become a member with the link below, I’ve got a good price for you currently of $3.95 per month fee + a free domain name. That is truly inexpensive compared to some other quality hosts.
4. Their service provides reasonably quick website loading times.
5. Bluehost is very simple to operate and manage your blog and has a lot of add on services I if you want that extras.
[Rehub theme : Using Box Shortcode example ]
The step by step Guide : Click here to buy your own domain and sign up for hosting with Bluehost. I have supplied a visual process guide of the whole method below.
Bluehost Step #1
Visit This Link (the same as the one above) and Click “Get Started Now” button
Bluehost Step #2
Select your plan.
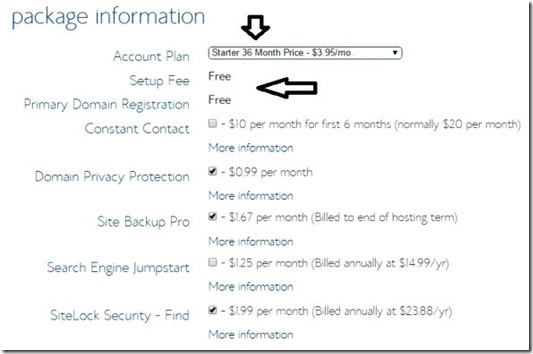
(Select 36 months to avail of Free domain offer, there is option of 12 month and 24 months as well)
Bluehost Step #3
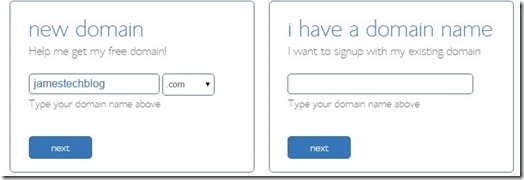
Select your free website name or bring over your current domain. Both are extremely easy procedures.
If you are choosing the package with free domain name , you can start searching from the domain search box in this form to check out which domain names are readily available for you to get.
Bluehost Phase #4
Place your website package request and pay for the package to proceed
Bluehost Step #5
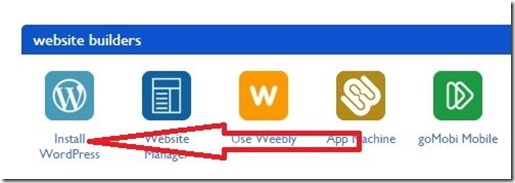
You will now get all the login details to your email , once you’ve logged in, you can use your Bluehost dashboard to go install WordPress (the software program that runs your site). This can be done in a couple of simple clicks.
BLUEHOST STEP #6
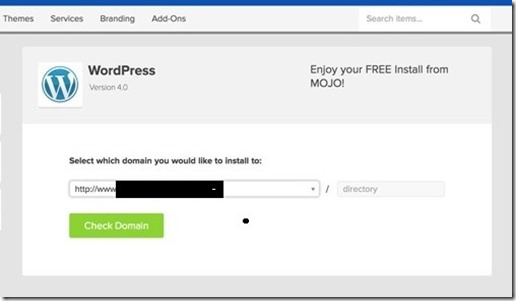
Click on the Blue/Green setup button.
Select the domain you immediately registered or the one you brought over.
Bluehost Step #8
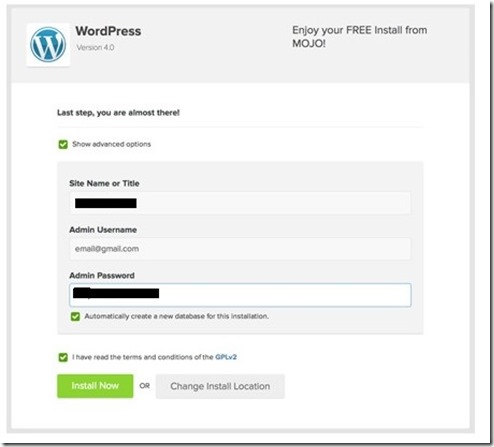
Verify the “show option” box and fill up the name, username, and also a password. The password or username is the information that you may utilize for your access to the back end of the blog that you will have. (Your WordPress control panel).
(save these details for later on your computer , as you will need it)
Bluehost Step #9
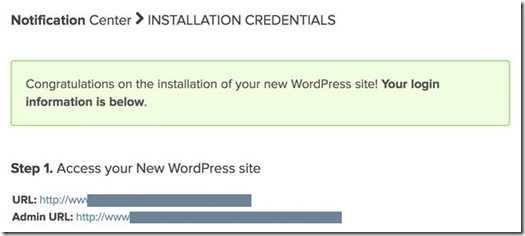
Bluehost will set up WordPress on the server, but you will be notified when it is complete
You can then click on the ‘View Credentials’
Next Phase #10
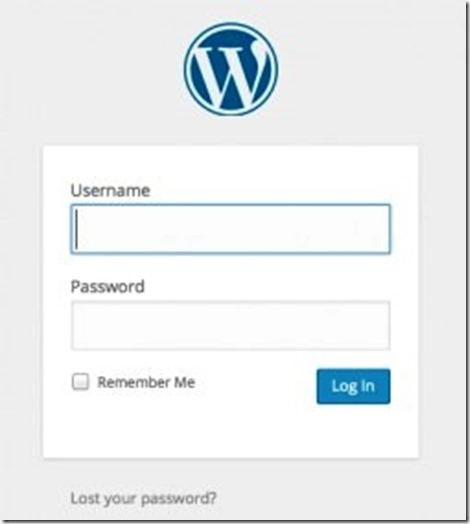
You need to provide your information for WordPress sign in from step 8 by clicking Admin URL displayed under the green box.
This process will lead you to the WordPress dash board-panel.
WordPress dashboard is where you got to write new articles on your blog , change the look , add plugins , change the site title name etc. You can manage your wp blog and make changes to it from here.
Final Step
This is your own WordPress Dashboard login area ( www.myblognamehere/wp-admin ) where you may write content for your website or even upload a brand new design or layout theme for your blog site. Actually, I would suggest investing in a most up-to-date WordPress theme at this website-Themeforest.net . You can browse thousands of wordpress themes on their website and choose a blog design suitable to your niche and $$ pocket. You will need to visit “WordPress” on the upper left part of the page. Then select your own theme type and you can also start discovering a large number of free theme or templates from here ( but I suggest pay and get a good theme , as it will always be updated as you pay for it and that is a security against hackers as well).
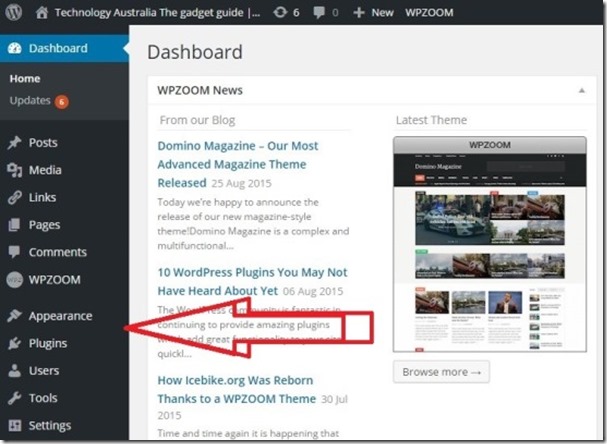
After buying your own theme from Themeforest, you may return to your WordPress dashboard and also click “Appearance” > Themes > Upload a brand new Theme. Here you will add the zip file of the design you bought/downloaded. It will automatically install it for you after it is uploaded and you click activate theme.
Lastly, you are going to follow your own theme’s setup guide and features provided by the person who created your design. You can upload your logo design, alter shades, add pages, and more.
Congratulations!
You will now got a brand new web blog. This is really only the beginning of an exciting trip for you which has endless possibilities. Take action NOW. Good luck !
—– Additional info : some more cheap hosting options apart from Bluehost —
Godaddy (Recommended)
Website : www.godaddy.com
Price: AUS – A$1.99/mo for Website Builder (
normally$8.99 month)$1.00 Deal (normally$10.99) – Clickhere
- Easily create your own website
- FREE HOSTING and UNLIMITED pages
- Beautiful, customizable designs
- Free Domain with annual plan
- Award-winning 24/7 technical support
Hostgator ( Also Recommended)
HostGator is a leading provider of web hosting, reseller hosting, vps hosting, and dedicated servers
Deal link: Click here
Coupon code2 25% off : DigitalGrog
(discount applied in link)


